Quantcast
Channel: TO35 – Vintage Tractor Engineer

Massey Ferguson TO35 With Low Oil Pressure

$
0
0

We’ve had this question from Tyler who has recently fully rebuilt his 23C engine out of a Massey Ferguson TO35. It looks as though Tyler has looked into most of the potential causes, but is there anywhere else he should look?

Dear Vintage Tractor Engineer,

I want to start by saying your 23C rebuild dvd is great. I have watched it many times trying to solve the problem I am writing you about.

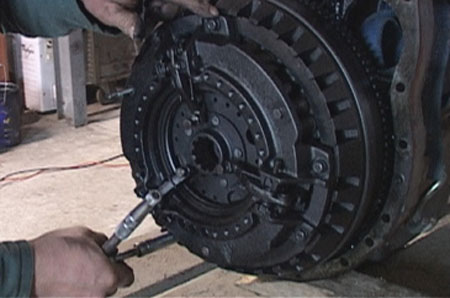
I have a 1959 Massey Ferguson TO35 with a Standard Diesel 23C. I had a retired tractor mechanic totally rebuild the engine for me only to find it has less oil pressure than before the rebuild. He can not find the problem.

The rebuild consisted of new liners, pistons, rings, main and rod
bearings, cam bushings, timing chain and tensioner, total valve job,
injectors and diesel pump. The crank was turned at the rods but the mains are standard. Oversized rod bearings were fitted. The cam bushings are standard.

Upon starting at 1400 RPM the engine has about 60PSI of oil
pressure but quickly falls to about 30 PSI and 10 PSI at idle. I have
tried the adjustment screw on the oil filter but it makes no difference.

I have cleaned the springs and balls in the oil filter unit, rebuilt the
oil pump, and changed the gauge but none of this has helped. Please give me some advice on what to try next. The tractor has the correct oil in it also. It runs well but has very low oil pressure. Your advice is greatly appreciated.

Thanks,

Tyler

Hi Tyler,

It sounds like a nightmare. Nothing worse than taking lots of care with everything (it sounds like you have been very thorough), put it all back together and then to find low oil pressure.

I guess the drop in oil pressure would suggest that it is either leaking
somewhere or one of the bearings is slack. Clearly it is as a result of the engine rebuild as you had good oil pressure before hand (suggesting there wasn’t any problem with the oil pump).

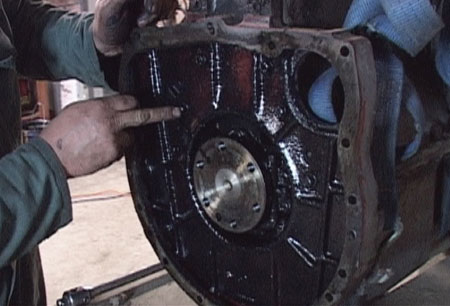
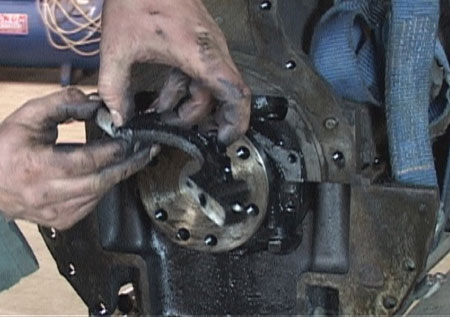
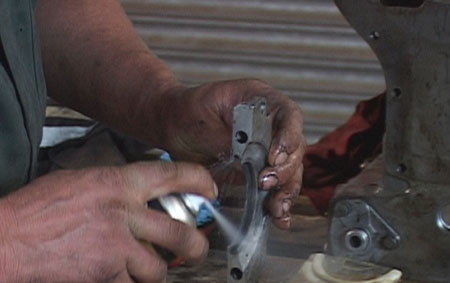
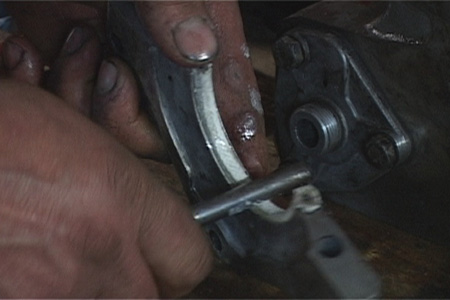
The gasket behind the oil filter elbow is easy to check and could be the first thing to take a look at. Or the gasket behind the front main
bearing/oil pump housing.

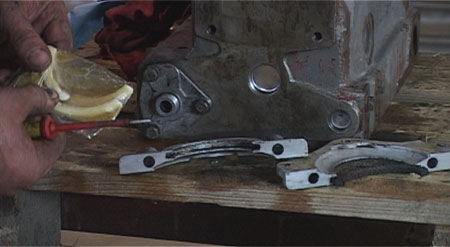
You say the pressure starts off at 60 before quickly dropping down. If the pump is all OK and has the potential to get the pressure to 60 then it could be a problem with a shell. Possibly an incorrect shell supplied?

I hope none of that sound condescending to you. It sounds like you have done a good job on the engine and been very thorough but now have got this problem. Really I don’t know the answer, but can only make the above suggestions.

Dismantling the whole engine is obviously a time consuming
job and then it still may not be obvious what the problem is.

Presumably the gauge you are using is correct? I guess it will be, and it is showing a drop. Is the oil pressure pipe that goes between the block and the pressure gauge clear and not blocked in any way?

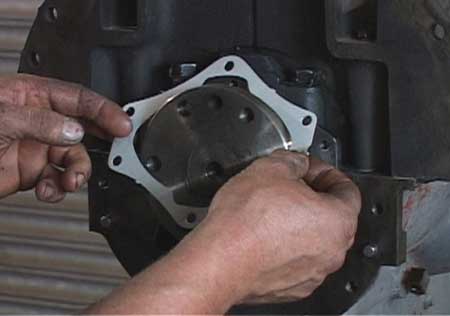
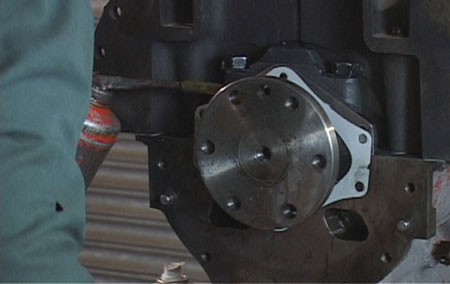
If I was a betting man I would go for the gasket on the back of the oil pump elbow.

Don’t know if any of that helps.

Let me know if you are able to get to the bottom of the problem.

Regards,

Steve Ridsdale (VTE)

If anyone has any other ideas then let Tyler know in the comments box below


Enlarging Pre-Combustion Chamber Aids Starting, Standard 23C Engine

$
0
0

We have written before about the benefits of enlarging the entrance to the pre-combustion chamber on the Standard 23C engine as fitted to the Ferguson FE35 tractor.

One of our fellow FE35 owners (Neil) had completed a full rebuild of his engine but the starting performance was disappointing.  Neil ordered Vintage Tractor Engineers’s DVD so see if there was anything he had overlooked, and the only thing hd could see different to his own job was that the engine in the DVD had had the entrance to the pre-combustion chambers enlarged.


Neil removed the cylinder head, loaded it up and took it along to Park Engineers (that’s who Vintage Tractor Engineer uses, and John at Parks knows his job inside out).   The grinding was done while Neil waited and then the engine was re-assembled as before.

And the result…

Much improved starting performance.

Here’s what Neil said…

Hi,

You may recall I emailed you earlier this month regarding difficult starting of my 23c engine. Working back to front I had overhauled the engine, experienced difficult starting, then purchased your DVD, which confirmed I had done most things correctly except I was not aware of the need to enlarge the combustion chambers.

You made me aware of two companies who are experienced in this procedure, one in Ireland and Park Engineering, North Yorkshire.

I contacted John at Park Engineering, he could not have been more helpful, the work was carried out whilst I waited. My tractor now starts satisfactory (no easy start!).

Thanks for your help in this matter.

Regards

Neil H.

Was this the only alteration to the engine?

Vintage Tractor Engineer asked Neil if this was the only alteration that was made to the engine – was everything else just as before. Neil replied…

Hi,

Thanks for your response. You ask, “is that the only change you have made”? Yes, just re-fitted cylinder head with a new head gasket.

Remarkable the difference, runs very smooth, will give it some work soon to settle everything down.

Once again, many thanks.

Regards

Neil H.

Conclusion

Vintage Tractor Engineer has never rebuilt a 23C without having these ports enlarged, so it has been good to get the feedback from Neil. It would seem that this modification makes all the difference.

If an engine is just experiencing poor starting performance and presuming that everything else is OK, then this modification is something well worth considering.

Steve and Ian Ridsdale

Setting Lever Springs For MF35 Hydraulics

$
0
0

Making the settings on the lever springs for the Massey Ferguson 35 hydraulic system is quite a fiddly job, and the method is shown in detail on the MF35 Hydraulics DVD.  However, we just thought that a written description of the process may also help.

Setting levers of hydraulics on massey ferguson 35

The spring balance should be attached at the very end of the levers

So here it is…

  • Loosen retainer nut and eccentric cam.
  • Make sure quadrant levers are set at their sector marks. The round lever exactly over where it says ‘FAST’, the square lever next to where it says ‘DRAFT’ between the two dots and exactly where the arrow is.
  • Make sure the lift arms are in the fully lowered position. (that is upwards if the top cover is flipped upside down).
  • Make sure your spring balance is connected right at the top of the lever (if it is connected lower down the lever it will require more force to move the lever).
  • When 3 lb. of pressure is applied it should only just spring it into contact with the front of the slot in the lever support bracket.
  • Obviously adjustment of the spring pressure is made with the self-locking nut on the guide rods.


After this adjustment is made the eccentric cam can be moved around into firm contact with the cam arm and the nut tightened.  The above adjustments can be checked – move the operational lever from its sector marks into the response range, as the lever leaves the ‘FAST’ position the levers that we set with the spring balance should begin to move to the rear of the guides.
The adjustment is very fine and fiddly.  It is often right at the end of the movement of the levers where the 3 lb. can be achieved.
The setting is 3 lb. (1361 grams) of force to move the lever.  The reason for this is that this equals the force applied by the control valve spring when the assembly is fitted and connected in the tractor.  It is a very difficult setting to make and when using a spring balance the 3 lb. setting cannot ever be particularly accurate.

Replacing Crankshaft Rope Seals

$
0
0

Oil leaking from a tractor clutch housing is a common problem.  We often get asked about this and what the repair involves.  The following information is based on a MF35 tractor, but the procedure is similar for many makes of tractor.

Oil entering the clutch/flywheel housing can be coming from one of two places.  It is either leaking seals around the crankshaft or leaking seals where the input shaft enters the gearbox.  In this tutorial we are going to look at how to replace the crankshaft rope seals.


Replacing The Seals

The tractor will require splitting and the removal of the clutch, flywheel, starter motor and adapter plate.

Removing MF35 Clutch

Removing clutch

Flywheel

Removing flywheel

MF35 clutch to engine adapter plate

Removal of adapter plate

Removal of seal housings

Removal of seal housings


When it comes to fitting the new seals, the first thing here is to soak the rope seals in clean engine oil for at least an hour before attempting to fit them.  This is important and is often overlooked.

Soaking the seals in clean engine oil

Soaking the seals in clean engine oil


After removing the old seals, make sure you get the grooves completely clean to take the new seals.

Cleaning crankshaft seal housing

Cleaning with clutch and brake cleaner


The seals supplied will be the correct length, so don’t be tempted to cut them shorter.  Once the seal is placed into position use a round edged tool such as a pin punch to work the seal into its groove, keeping it protruding equally at both ends.  It should protrude by approximately 0.3 – 0.5mm at each end, but don’t either stretch the seal by too much and make it protrude by more than this distance or work it too far in and not have anything protruding.  You will need to apply a firm amount of pressure when working the seal in, making sure that it is fitted well into the housing.

Fitting engine crankshaft seals

Working the new seals in


Take some care when doing the above, as people often rush the job and end up with it leaking again.

There will also be a new gasket to fit behind where the rope seal housings fit back on.

On goes the new gasket

On goes the new gasket


You are now ready to fit the two rope seal half housings back on.  Before fitting the housings back together we would advise smearing some oil  onto the crankshaft where the seals run.

Oiling the sealing surface

Oiling the sealing surface


Fitting the housings can take some time as it is a bit of a fiddly job.  Tighten down the holding together bolts a bit at a time at each side to keep the pressure on the housing and seals equal.  It may be necessary to lightly clamp the housings together in order to get the bolts started.

Gently pulling the housings together to help get the bolts started

Gently pulling the housings together to help get the bolts started


These photos were taken when we were doing the 3 Cylinder Engine Rebuild DVD, so the engine was removed from the tractor and only partially rebuilt.  In normal circumstances, this task would be undertaken with the tractor split, but with the other engine components still attached and the front wheels attached.

While you are in this area of the tractor it is often sensible to replace the small spigot bearing in the centre of the flywheel.  Flywheel holding bots should be tightened to 75 lbs/ft (MF35).

Both removal and re-fitting of the clutch is quite an involved process and you will need to follow the correct procedure in order to remove it safely.  This is obviously a good time to assess the clutch and undertake any necessary work.

White Smoke And Misfire, Perkins Engine

$
0
0

The Problem

We recently had a message from Jock who has been getting white smoke and misfire when the engine is ticking over (Perkins 3A.152).  The engine had recently been rebuilt with a crank re-grind, head skim and piston/liner replacement.

When hot and working hard the engine runs fine, seems to have sufficient power and burns clean with no white smoke.  The valve seats have been re-cut, but only a DIY job without new inserts or guides.  Jock adds that the cam is a bit worn with occasional pits and that he has tried adjusting the timing on the pump advance, but without making much difference.

Jock also asked about the heads you can buy for around £200.  Are they any good or would we suggest renovating the original head.


The Cause Of The Smoke

White smoke is usually unburnt fuel.

One common reason for this at low revs (but no white smoke at high revs) is dribbling injectors.  This is called low speed hosing, as they don’t cut off cleanly and cause smoke from the unburnt fuel.  We have even experienced this with new injcetors and have had to re-grind them on the Hartridge Injectomatic machine to re-finnish the angle at the bottom of the nozzle and the needle.

The needle needs to be at 30 minutes (ie. half a degree)  different to the seat angle, otherwise the injector spring cannot exert sufficient pressure on the point of sealing to create a sufficiently tight enough sealing pressure (as the spring pressure is spread out over too large an area if the angles are not exactly 0.5 degrees different.

Think of two cone shaped objects (one inside the other) coming together to create a seal.  The outer cone is the nozzle and the inner cone is the needle.  If they are cut at exactly the same angle (or worn so they are now at the same angle) they will try to seal along the whole length of the cones.  Whereas if they are at slightly diferent angles then the inner cone will seal just at its tip.  So not only is there more spring pressure applied to this point, but also the circumfrance of the sealing surface is much smaller (at the cones point) and so less sealing area so leak.  Hope that makes sense!

It may be worthhwhile for Jock to take the exhaust manifold off and then start the engine. You should be able to see which cylinder is producing the white smoke (if it is one particular cylinder rather than all of them). The two front cylinders come out of the one front hole, but you can sometimes differentiate between the two front cylinders if you look carefully enough.

Personally I rarely think that cutting valves by hand is good enough.   If the original head is serviceable then I would definately go for new guides and seats in your original head rather than the new £200 one. When you see the valves and guides serviced at an engineers it can be observed that they take some considerable time and care over the job.

If you turn the engine slowly with a starting handle you can actually hear if the valves are leaking (exhaust and inlet manifolds removed).


Low Compression Causing Unburnt Fuel

It is possible that anything which causes low compression can cause incomplete burning of the fuel, as the diesel engine works by compression ignition.

For that reason, Jock should also look at the condition of the valves.

However, given the symptoms of white smoke only at low revs then VTE thinks that the injectors would be the first thing to look at.

Rebuild DVD For Massey Ferguson 35X ?

$
0
0

Message:
My tractor is a 35x – does your rebuild video for the 3 cylinder Perkins MF35 cover this engine? I am not sure what the ‘x’ means. I have oil blowing out the dipstick and some pretty blue smoke……so an engine rebuild is possibly on the cards. It costs Euro 2000 to get it done in a professional workshop. I would like to do it myself. I am a farmer, not a mechanic, so will rely heavily on the video.  Could you advise please.

Basically it is the same engine and so the DVD is 99 percent relevant.  The 35X engine was uprated in power slightly.  You may notice very slight differences with the cylinder head and the injection pump will have been set differently by the diesel engineer.  But non of this should affect the strip-down and rebuild process.

The DVD will take you through the whole process.  Using the DVD you will be able to assess the components and decide what needs replacing.  However, if they have got to the point of oil blowing from the dipstick then basically it will need a full rebuild kit.

The cost you probably won’t be able to avoid is taking it to your local engineers, you can see what they do in the DVD and the quality of the job which cannot be replicated in the farm workshop.  The trailer for the DVD gives you a feeling for this work.

We produce the DVD’s so that anyone can follow them.  No previous mechanical knowledge or experience should be necessary.  If you run into any problems then please just drop us an email and we will advise if we can.

Thank you for the enquiry.

The Vintage Tractor Engineer